OpenSSL 자체 서명 인증서 생성

이 글에서는 루트 인증서 및 서버 인증서 생성 방법에 대해 설명합니다.
openssl을 사용하므로, 사전에 미리 설치해야 합니다.
루트 인증서 생성
1. 개인키 생성
루트 인증서의 개인키 파일을 생성합니다.
도중에 입력하는 비밀번호는 추후에 서버 인증서 생성 시 사용되므로 잊으면 안됩니다.
$ openssl genrsa -des3 -out rootca.key 2048
Generating RSA private key, 2048 bit long modulus (2 primes)
............................................................................................................................+++++
..............................................+++++
e is 65537 (0x010001)
Enter pass phrase for rootca.key: [개인키 비밀번호 입력]
2. CSR(인증서 서명 요청) 생성
루트 인증서 발급 전, CSR 파일을 생성합니다.
$ openssl req -new -sha256 -key rootca.key -out rootca.csr
Enter pass phrase for rootca.key: [개인키 비밀번호 입력]
You are about to be asked to enter information that will be incorporated
into your certificate request.
What you are about to enter is what is called a Distinguished Name or a DN.
There are quite a few fields but you can leave some blank
For some fields there will be a default value,
If you enter '.', the field will be left blank.
-----
Country Name (2 letter code) : KR (KR 고정)
State or Province Name (full name) : Seoul (시/도 입력)
Locality Name (eg, city) : Yeongdeungpo-gu (시/군/구 입력)
Organization Name (eg, company) : Lee&IT (회사명 입력)
Organizational Unit Name (eg, section) : BLOG (부서명 입력)
Common Name (e.g. server FQDN or YOUR name) : Lee&IT Root CA Certificate (루트 발급기관 입력)
Email Address : (이메일 입력)

Please enter the following 'extra' attributes
to be sent with your certificate request
A challenge password []: <- 엔터
An optional company name []: <- 엔터
3. 인증서 발급
생성한 CSR 파일로 루트 인증서를 발급합니다.
$ openssl x509 -req -sha256 -days 3650 -in rootca.csr -signkey rootca.key -out rootca.crt
Signature ok
subject=C = KR, ST = Seoul, L = Yeongdeungpo-gu, O = Lee&IT, OU = BLOG, CN = Lee&IT Root CA Certificate
Getting Private key
Enter pass phrase for rootca.key: [개인키 비밀번호 입력]
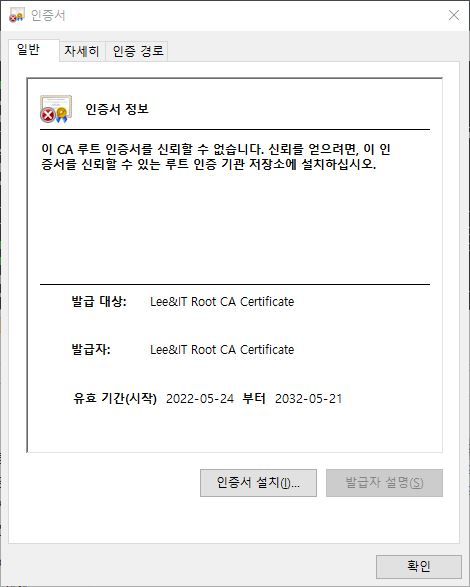
인증서 확인
생성된 루트 인증서를 열어보면 정상적으로 발급되어 있는 것을 확인할 수 있습니다.
공인 인증된 인증서가 아닌 자체 서명한 인증서이므로 신뢰할 수 없다고 표시되는 것이 정상입니다.
OpenSSL 명령어로 확인
$ openssl x509 -text -in rootca.crt -noout
서버 인증서 생성
1. 개인키 생성
루트 인증서 생성시와 동일하게 입력합니다.
$ openssl genrsa -des3 -out server.key 2048
Generating RSA private key, 2048 bit long modulus (2 primes)
............+++++
.................+++++
e is 65537 (0x010001)
Enter pass phrase for server.key: [개인키 비밀번호 입력]
2. CSR(인증서 서명 요청) 생성
루트 인증서 생성시와 동일하나, Common Name 부분은 서버 인증서로 사용될 메인 도메인을 입력합니다.
$ openssl req -new -sha256 -key server.key -out server.csr
Enter pass phrase for server.key:
You are about to be asked to enter information that will be incorporated
into your certificate request.
What you are about to enter is what is called a Distinguished Name or a DN.
There are quite a few fields but you can leave some blank
For some fields there will be a default value,
If you enter '.', the field will be left blank.
-----
Country Name (2 letter code) : KR (KR 고정)
State or Province Name (full name) : Seoul (시/도 입력)
Locality Name (eg, city) : Yeongdeungpo-gu (시/군/구 입력)
Organization Name (eg, company) : Lee&IT (회사명 입력)
Organizational Unit Name (eg, section) : BLOG (부서명 입력)
Common Name (e.g. server FQDN or YOUR name) : leenit.kr (메인 도메인 입력)
Email Address : (이메일 입력)

Please enter the following 'extra' attributes
to be sent with your certificate request
A challenge password []: <- 엔터
An optional company name []: <- 엔터
3. 확장파일 작성
서버 인증서 발급에 필요한 확장파일을 작성합니다.
subjectAltName 부분은 해당 인증서로 사용될 서브 도메인을 입력합니다.
*.leenit.kr 과 같이 와일드카드 인증서로 발급할 수 있습니다.
$ vi server.conf
basicConstraints = critical, CA:FALSE
subjectKeyIdentifier = hash
authorityKeyIdentifier = keyid,issuer
keyUsage = digitalSignature, keyEncipherment
extendedKeyUsage = serverAuth, clientAuth
subjectAltName = DNS:leenit.kr, DNS:blog.leenit.kr, DNS:*.leenit.kr
4. 인증서 발급
$ openssl x509 -req -days 3650 -extfile server.conf -CA rootca.crt -CAcreateserial -CAkey rootca.key -in server.csr -out server.crt
Signature ok
subject=C = KR, ST = Seoul, L = Yeongdeungpo-gu, O = Lee&IT, OU = BLOG, CN = leenit.kr
Getting CA Private Key
Enter pass phrase for rootca.key: [루트 인증서 개인키 비밀번호 입력]
인증서 확인
$ openssl x509 -text -in server.crt -noout